It’s the 20th of August, which is the 232nd day of the year. Based on how 2020 has gone so far, I calculate there are now only 3 aeons left until the end of the year! So, let’s get right on with some news which is more positive:
Our first Ecuadorian Expert
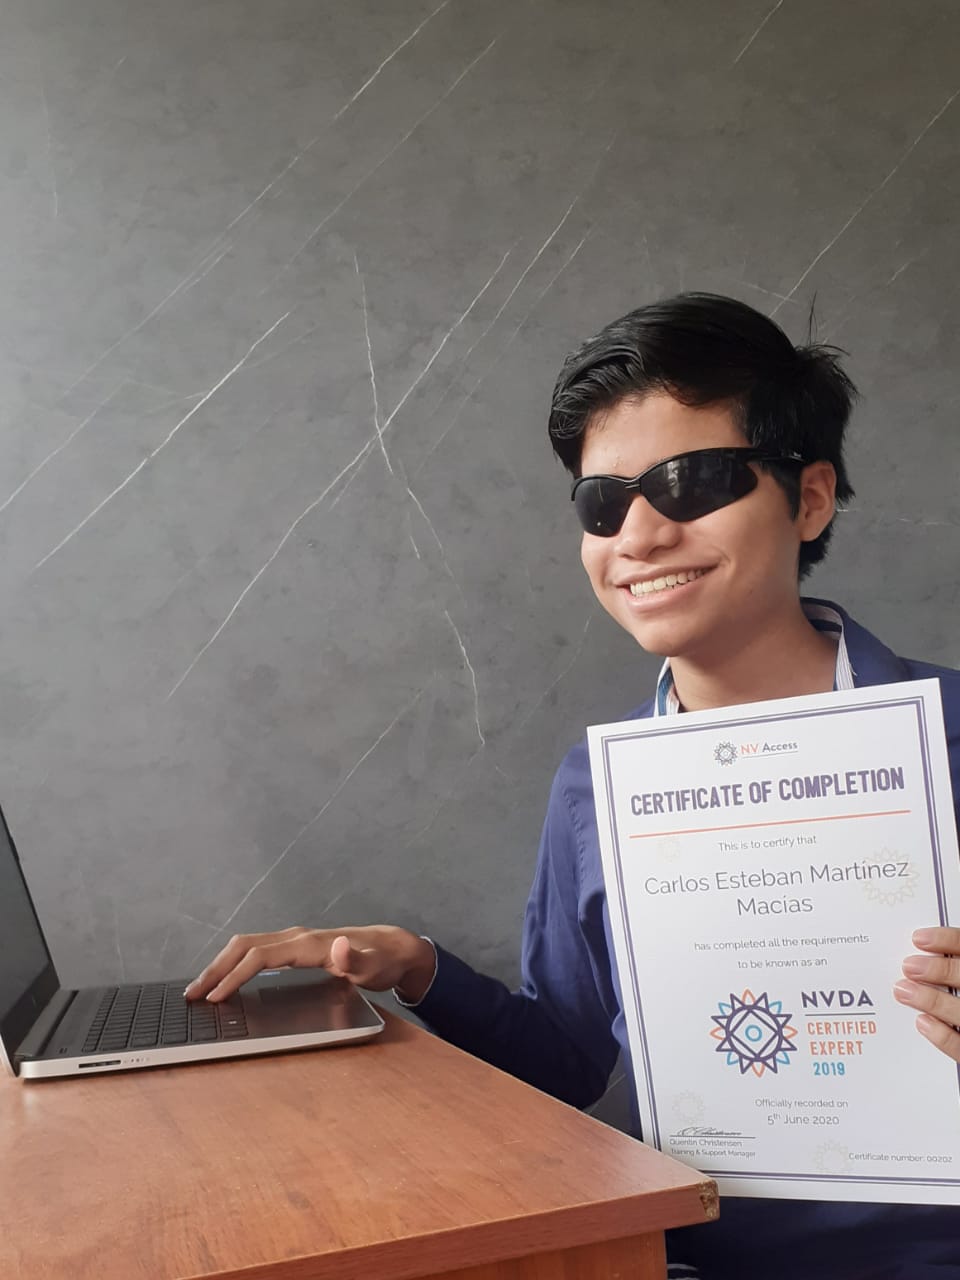
Last week we published a story on Carlos Esteban Martínez Macías. Carlos is our first NVDA Certified Expert in Ecuador, and, at 15, one of our youngest! The story has received a lot of positive comments and conversation. We wanted to highlight it here for those who haven’t yet had the chance to read it. Indeed, we would call him, Carlos, an ‘Ace’ of Technology in Ecuador.

Carlos Esteban Martínez Macías holding NVDA Certified Expert Certificate and with hand on PC keyboard
If you’re not familiar with the NVDA Certified Expert program, it’s a great way to demonstrate your proficiency with the World’s Favourite Screenreader. The exam itself is challenging, but free for anyone to sit. Once you pass, and want to be recognised as an NVDA Certified Expert, the cost is $100 AUD. That gets you a certificate you can print, and public listing on our NVDA Certified Experts list. Importantly, your support also helps keep NVDA completely free for anyone in the world who needs it.
CSUN 2020 Going Virtual
One of the biggest public events we generally do each year is the CSUN Assistive Technology Conference. Held in California, CSUN is one of the world’s largest assistive technology conferences. This year, unfortunately, we weren’t able to attend because of Covid-19. To ensure everyone can attend next year, CSUN have announced the 2021 CSUN Conference is Going Virtual. We look forward to being able to attend again!
After reading the 2021 CSUN Conference Announcement, you can also follow the #CSUNATC21 Hashtag on Twitter to join in the conversation.
NV Access Now Hiring
A reminder that NV Access is seeking to appoint a Full-Time Software Engineer to join our small team. Your work will focus on improving our NVDA screen reading software and related online infrastructure, including feature implementation and bug fixing. You must be an Australian Resident (for tax purposes). We covered some questions on the position in In-Process, 6th August 2020. Go to the NV Access Seeking Software Engineer Job Advertisement for all the details and to apply.
OneCore Improvements
Lately, we’ve been highlighting new features in NVDA 2020.2. If you haven’t yet updated, please do read the full NVDA 2020.2 Release Notes. One new feature is an improvement in performance when using Windows OneCore Voices. Often called OneCore, these voices are the default synthesizer in Windows 10. OneCore has improvements in both performance and clarity over the older SAPI5 voices. If you haven’t tried OneCore in awhile, it is worth another look.
Earlier this year, we added a Rate Boost option to NVDA (in NVDA 2019.3). We highlighted the features of that option in a Video Premiered in In-Process 6th March 2020.
To set your synthesizer, press NVDA+control+s to open the synthesizer dialog. Use the arrow keys to select a synthesizer, and press enter to keep the change and close the dialog.
Speaking of speech, let’s look at a couple of other NVDA voice settings you might not have tried recently.
Synth Settings Ring
The most common voice options for the current synth can be set from the Synth Settings Ring. There is a demonstration of this in the Video on Rate Boost. The keys are slightly different between Desktop and Laptop keyboard layout. I’ll start with the Desktop keyboard layout keys. To move to the next setting in the Synth settings ring, press NVDA+control+right arrow. To move to the previous setting, press NVDA+control+left arrow. Press NVDA+control+up arrow to increase the value of the current setting. Press NVDA+control+down arrow to decrease the value of the current setting. Using Laptop keyboard layout, add shift to those keystrokes. Press NVDA+control+shift+right arrow to move to the next setting, for instance.
When changing to a new synthesizer, this is a great way to get a feel for what options works best for you. If you make a change and don’t like it, or can’t understand the voice, DO NOT QUIT NVDA! Press NVDA+control+r to reset NVDA to the saved settings. Unless you saved the settings specifically, this will revert any unsaved changes. NVDA’s default option is to save changes to settings on exit. So, exiting NVDA when it isn’t working correctly will actually save those changes.
Audio ducking
Audio Ducking is an option which lowers the volume of all other sounds on the computer, to make it easier to hear NVDA. This option can be set so that other sounds “Duck when outputting speech and sounds”. That lowers the sound from other programs only while NVDA is actually speaking. You can set NVDA to “Duck always”, which lowers the volume of everything else whenever NVDA is running at all. The default option is “off” – so NVDA does not adjust the volume of other programs.
You can change between these three settings at any time with NVDA+shift+d. Alternatively, the audio ducking option is available on the Synthesizer Dialog. Note that audio ducking is only available when NVDA is installed, and only on Windows 8 or 10.
Eloquence and Other Synthesizers
NVDA uses OneCore by default on Windows 10, and also comes with eSpeak-NG. If you can’t get either of those just to your liking, remember to check out our Extra Voices page. We have links to many third party synthesizers. Code Factory’s Eloquence and Vocalizer bundle is popular with those coming from other screen readers. Acapela, Nuance Vocalizer, Infovox4 and Next Up’s Ivona are popular with those who want something different. There are also synthesizers designed for specific languages. These include Russian, Mongolian, and south Asian languages. If you know of a synthesizer we haven’t listed, please do Let Us Know.
That’s all for this week, stay safe and well everyone!